Poetry Cafe – iPad Style

Our grade four classes read and write poetry.  Rindi Baildon brought a lovely poetry celebration with her from Taipei International School.  Students turned their poems into illustrated movies complete with their voices reading the poems.

Over the years the tools we use for the project have morphed from Windows Movie Maker to iMovie to VoiceThread.  This year I have tried it on the iPad. Here’s how it turned out. Note that I used a famous poem. Students use a poem they have written.

https://www.youtube.com/watch?v=hI7qdw77h0s

I was hoping to lessen some of the bottlenecks we run into on this project. One bottleneck was finding photos. Kids could spend an insane amount of time finding the perfect photo. Inevitably they would wander out of the photos with Creative Commons licenses and end up falling in love with a copyrighted photo which they couldn’t use.

Another bottleneck was that kids were not overly attentive to writing down the source info for each image. Getting it into the movie was a pain with every tool except VoiceThread.

A final bottleneck was getting the text onto the photos.  Neither Windows Movie Maker nor iMovie gave enough granular control to make kids happy with where the text appeared.  Often they couldn’t find a text color that made the text easy to read against their photos.

Haiku Deck lessens some of those problems.

  • It has an exceptionally great search engine for high quality images.
  • The free photos all have Creative Commons licenses.
  • The photo credits and CC license come in with the photo.
  • Text inserted over photos can automatically have a background which makes the text easy to read.

Work Flow

The entire project took me 2.5 hours in one sitting. I think with kids it would take at least six class sessions. It could be quite a bit longer, especially if the children did not have prior experience with Haiku Deck and iMovie.

Here is the workflow I used. I’ve added estimates of how long I think this would take with students.

  1. Open Haiku Deck. Login to class account. (10 min)
  2. Create a new Haiku Deck. Give it a title. Create the title slide. (10 min)
  3. Create a slide. Select the layout of the slide. Dictate the poem line(s) onto that slide. Repeat until the entire poem is in the presentation. (20-40 min)
  4. Add an image to each slide. (1-2, 45 minute class periods)
  5. In presentation mode, take a screen  capture of each slide. (15 min)
  6. Take a screen capture of each slide with the credits showing. (15 min)
  7. Start a new movie (not a trailer) in iMovie. Pull in each poem slide and each credit slide in sequential order. (15 min)
  8. For each the poem slide, adjust it so that the photo and text are all showing and the Ken Burns effect is off/minimized. (30 min)
  9. Record yourself reading the poem.  (20 min)
    Use headphones with a microphone.  Have a copy of the poem printed out because the recording tools may cover the text on your slide while you record. NOTE: Some children will be able to record the entire poem in one recording.  Other children will do better making a separate recording on each slide or for each stanza. This part of the project can eat up lots of time if you aren’t careful.
  10. Adjust the clip lengths to match the recording length. (20 min)
  11. To make a photo credits title slide, I took a photo with the camera flat on the table.  I imported that black photo and put my title on top of it. (10 min)
  12. Shorten each credit slide to make them go by quickly.  (5 min)
  13. Add credits music.
  14. Send the video to the class YouTube channel.
  15. Insert into blog post using Blogsy.

Celebration

In the past, teachers would invite parents in for a Poetry Cafe. It would be in the group room or the classroom. There would be table cloths, centerpieces, treats.  Each child would introduce their poem and then we would watch their cafe video using the projector. Parents had notecards on their tables to write compliments to their child. It was always a lovely event.


Ways to Shorten the Project

  • Use a shorter poem.
  • Put more lines per slide. My presentation only has one line per slide. This meant I needed lots more time to find images and I had lots more credits slides.  Haiku Deck can now handle multiple lines per slide if you choose an appropriate layout.
  • Don’t include music.
  • Have music that plays softly through out the entire movie.
  • Prevent children from rerecording endlessly or from searching for photos for too long. Your perfectionists can take many days on each of those tasks if you allow them to do so.


Challenges

  • I couldn’t find music in iMovie which fit the mode of this movie so I found some in YouTube Create.  That took lots of steps…
    • I had to find the music in YouTube on a computer.
    • Download it.
    • Open on my iPad using Mail app.
    • Send the song to iMovie. (My iPad was cranky so this step required two reboots.)

      I would not want to follow all of those steps with students.  I’d either limit them to what is in iMovie (which is all bold and perky) or I’d prepare for the project by downloading some of that music ahead of time.)

  • Adding the sound track to iMovie was a challenge.  In the end I had to do all of this.
    • Insert a soundtrack.
    • Crop it to only play during the poem, not during the credits.
    • Mute it.
    • Insert my credits music.
    • Fade it in and out using the fade setting.

Have you completed a project such as this with students on iPads? Which apps did you use? Any tips or suggestions?

“Hello Siri!” – Introducing Students to Siri

At this time of year, few of our grade four students cannot type quickly on a computer keyboard or an iPad keyboard.  As a result, many classes do most of their drafting on paper in notebooks. However, revision is challenging on paper.  Having a quick way to convert handwritten drafts into digital texts would be a real boon.

With the release of iOS 8, Siri can now take continuous dictation.  That removes the barrier of text entry on an iPad.

Here is the presentation I used to introduce Siri.  Note that you can view it with the speaker notes.

I have revised it to make it work even better with my next class.  One revision is adding themselves to their contacts. Most students’ Mail apps are not drawing on the full school address book as they should. I had the students add themselves as a contact so that we could teach Siri who they were. I also had them add their classroom teachers.

When I held up my iPad and demonstrated each request on slide #7 students were awed.  Some even clapped. When I gave them a chance to practice talking to Siri, they were delighted. Some were even successful having Siri help them send an email.

After class I added slide #16.  When I sent students off to dictate their handwritten essays, many were pressing the home button instead of the microphone to initiate dictation.

I had shared out with each of them a blank essay document via Teacher Dashboard SmartCopy.  Having a written text in front of them when they first tried to dictate was a good first step.

Most were successful. In 10-15 minutes they had dictated and corrected the mistakes in their essay. Typing it would have taken them 40 minutes or longer. One child dictated her written essay. Then she dictated from her head her second essay which she had been thinking about but had not started drafting.

Some students who struggled initially were correcting every mistake as Siri made it. When I pressed them to talk a few sentences and then go back and fix mistakes, they were amazed to see that Siri went back and corrected some mistakes once she had more context.

We only had one student whose accent made the dictation too difficult.  He was very frustrated.  After he gave it a good try for 20 minutes, at his request he retired to typing. Fortunately, he is a quick typist.  A teacher shared with him that her son has difficulty saying words with the letter R.  The child was relieved to realize he was not the only one who could not make it work.  Next time I teach this lesson I will discuss this ahead of time to keep kids from feeling discouraged.

I recommend to teachers that they plan a time to let children share the Siri tricks they know. For example, if you ask Siri “What does the fox say?” She gives you a different response each time you ask.  Many children know other questions for which Siri makes funny responses.  Give children time to explore this and share, with a clear understanding that continuing to do so after that lesson will lead to losing their Siri privileges. It is a great Friday lesson so that they have the weekend to move on from it.

Basic Mail Merge Template for Google Docs

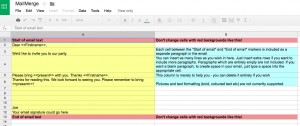
Finally played with this basic mail merge template for Google Docs. I like it. It’s a great tool for teachers.


monosnap-window title-1


In the data tab create a spreadsheet of your class with the following information:

  • student first
  • student last name
  • the correct pronouns (he/she, him/her, his/her)
  • email of each parent
  • parent names.

Set that up once and you are in mail merge Nirvana for the rest of the school year. Easily send personalized info to parents all year long. It should work for mailings of less than 100, so secondary teachers may need to organize it by day of the schedule.

Check out this LifeHacker post for directions and the link to the template:

http://lifehacker.com/5863338/get-mail-merge-in-gmail-with-this-google-docs-templat


iTunes – Regifting an App

Our school is in the process of migrating from school-managed to family-managed iPads.  I think it is a good move since it will allow us to better differentiate the iPads for each learner.  However, getting there is a bit of a slog.

Today I created these directions to help parents whose children either didn’t receive or managed to delete the iTunes email letter which allows them to redeem a gifted app.  Fortunately, the sender is not charged for the app until it is redeemed. There is no additional charge incurred to resend the gifting letter. You can find an easier to print version here.


iTunes – How to Regift and App


Occassionally, your child may not receive or may delete the iTunes email message letting him or her download an app you have gifted to them. Fortunately, you are not charged for an app until it is redeemed, and it is easy to resend the gifting message. Follow the steps below.

Open iTunes on a computer.

Open iTunes on a computer.

Click on the iTunes Store.

Click on the iTunes Store.

Sign in with your account.

Sign in with your account.

In the Quick Links section click on Account.

In the Quick Links section click on Account.

Scroll down to Purchase History. Click on Manage Gifts.

Scroll down to Purchase History. Click on Manage Gifts.

Locate the gift.

Locate the gift you sent to your child. Click on View.

Locate the gift.

Click Resend Gift.

Your child will receive another email message containing a link which allows them to redeem the gift.

Click Resend Gift.

Thank you.

Thank you for sending the link again. If your child still does not receive the email, please double check the address to which you sent it. If you sent it to the wrong email address, go back to the app in the app store and gift it to the correct address.

Google Presentation: Printing Speaker Notes

Every now and then someone asks me how to print speaker notes for a Google Presentation.  I made this video to go with a particular unit, but these steps can easily be generalized.


Google Docs Chat: Changing a Distraction into a Powerful Tool

The Ed Tech team at my school has been sipping the Google Apps kool-aid for a long time. I still remember how enchanted I was the first time that four of us in different parts of our geographically large school were collaborating in real time on a budget document. The chat window was open and comments were being added.  It was powerful, effective collaboration.


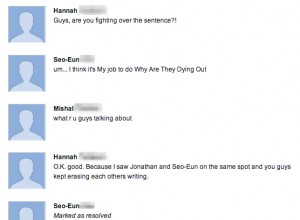
Our elementary students dearly want to chat while working, but that usually comes at the cost of their productivity.  During work time, some are irresistibly drawn to filling the chat box with illuminating sentences such as these:

I like cheese!
Hiiiiiiiiiiiiiiiiiiiii!
I am awesome!!!!!!

Today I was happy to have a chance to teach a grade 4 class how to effectively use the communication tools in Google Docs. In their homeroom they have been working in groups to research endangered environments.  They took notes in a variety of formats, some on posters, some on sticky notes, and some on iPads. Our next step was to have the group members combine their notes into a reference document.  As their final step, each student will use their group’s reference document to create their own Haiku Deck presentation which will be presented and then posted on their blog.


Before class we set up a blank document for each group in a collaborative folder in Google Docs.  That saved time and put the documents where we could easily find them.


To start class I explained that they were going to have a chance to use Google Docs in the way that adults use them on the job. They were going to make one document that contained the notes for their entire group. To help them work efficiently, they were going to use the chat box and the comments feature.


I opened one of the team documents and had a student open the same document on her computer so we could review how you can tell where someone else is working in a document.  Next, I typed some sentences which included errors. The student modeled correcting those, since that is one way people collaborate.  After that I used the comment feature to ask a clarifying questions about something.  Finally, I used the chat to ask her a question.

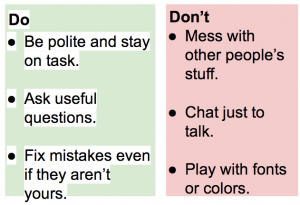
I gave the students these guidelines for their work.

Screen Shot 2014-03-31 at 1.38.48 PM


Knowing that the chat feature  could prove to be too distracting, I also let students know that if needed, we would move them to Mircosoft Word and then we could paste their notes into Google Docs at the end of the period.


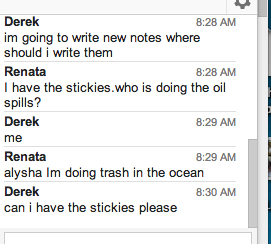
Students took the assignment very seriously.  They got right to work.  At first the chats were full of organizational questions about who would do what and where it would go in the document.

derek


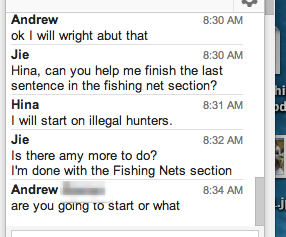
After they had been working for a while, the chat discussion turned to the contents of their document. They asked clarifying questions and shared new information with the people writing those sections.
monosnap-window title-5         monosnap-window title-4


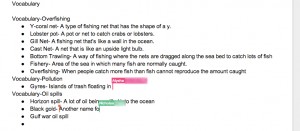
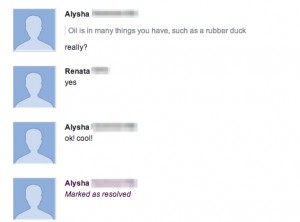
It became clear as the students worked that they were taking the time to read over each others writing. You could tell by the colored cursor marks that sometimes one student was following behind making corrections.


monosnap-window title-6


It was a highly productive 35 minute work time.  All of the documents were well-underway by the time we logged off the computers. One highly distractible student commented that he only managed to add two notes.  I was not too worried about that because he really was following the chat and reading what people were writing.  He was more focused than I’ve ever seen him before and I suspect he learned quite a bit from what the other children were writing.


At the end of class we debriefed the process. Here are their observations.

What went well:
  • We worked together well and we used the chat to help us figure out how to change what wasn’t right.
  • I asked for help and people responded positively.
  • Sometimes kids asked for something and they got it.
  • We could do what we did best to help our group.
  • On the chat we figured out what each person should do. Then on the last part we all had a job and we got it done.
  • Sometimes it worked better to walk over and talk to the person.
What was hard or needs improvement:
  • There were so many people doing things, like adding spaces and that made my words go down to a different page.
  • It was confusing to have so many people on a section while you were on trying to correct it.
  • It was hard because I had to watch the chat and do my own work.


I was able to tie that last comment back to the start of the school year. During our digital citizenship lesson we used Common Sense Media’s Digital Passport games. One lesson from the Twalkers game focused on the challenges of multi-tasking.  The children all lit up as they made the connection. A few students shared their successful strategies such as only checking the chat box occasionally.


Overall I was very pleased with the lesson.  It changed beguiling features from distractions to tools. The students had more chance to interact and their interactions were on task. To my delight, the students continued to use these tools later in the morning.  They  must have resumed working in their classroom using their iPads.  Since the chat is not available in the Google Drive app, students started using the commenting feature instead to ask questions regarding specific portions of the text.

monosnap-window title-7                 monosnap-window title


I hope this lesson is sticky.  I will be watching to see if in the future, they revert back to the I like cheese comments or if they continue to use the chat and comments productively.


How do you tame the distractions in Google Drive?  Please share strategies that are working well for you.